
Guides
- Details
- Category: Guides

Menu
-
Beach (かわら)
-
Game (ゲーム)
-
Move (いどう)
-
School (がっこう)
-
Explore (たんけん)
-
Move (いどう)
-
Game (ゲーム)
-
Home (じたく)
-
Escape (だっそう)
-
Back (もどる)
-
Health/Vitality げんき
-
Stomach (おなか)
-
Vitality (げんき)
-
Ikuko (いくこ)
-
Hanoko (はなこ)
-
Fortune (うらない)
-
Go to bed (ねる)
-
Rice/Food (ごはん)
-
Walk (さんぽ)
-
Hanoko (はなこ)
-
Park (こうえん)
In this manga-based virtual pet by Flex, you are taking care of a dog named Mametarou, and helping him become friends with his owner, Ikuko, and girlfriend, Hanoko. The meters you need to care for are stomach, vitality (sleep), and relationships with Ikuko and Hanoko. You can have Mame hangout at home or leave the house and travel to the beach, school, Hanoko's house, or the park.
Note: Each main location such as the beach or school, will only show their sub-menu options when someone is there. So if the park is empty, Mame will tell you no one is there, and then give you the option to go somewhere else.
Beach
 |
At the beach, you can play a game of catching butterflies. You must wait until the butterfly lands on Mame's ear to catch it by hitting the enter button. You can impress Hanoko when she comes with you, if you catch at least 5 butterflies. |
School
 |
You can only interact at the school if Ikuko-chan is there during the day. You can explore the campus or play a game of find the melon pan. When you explore the campus, you may come across Ikuko telling Mame that he shouldn't wander so much. You can also run into other characters, or find a melon pan somewhere to eat. If Mametarou does find a melon pan, he will eat it, and it will raise his stomach score. You can only play the melon pan game if Hanoko is with you. It is similar to the cup, shell, or playing card game you see street performers play. A melon pan will be hidden under a box, and you must watch as the boxes are shuffled to see where the melon pan is. |
Home
 |
When you are at home, there can be one of four icons displayed on the left-hand side of the screen. |
 |
This icon means that Ikuko-chan is at school. You can now go to the school to visit her. |
 |
This icon means that Ikuko-chan is home, and is willing to take Mametarou for a walk. |
 |
If this icon is displayed, you can feed Mametarou some rice. |
 |
If this icon is displayed, you can feed Mametarou some dog food. |
Escape
Choosing this option will give you a list of the main locations. Select one to escape the house and travel around town.
Back
Choose this option to back out of the menu and see Mametarou at home.
Health/Vitality
This option shows your status menus. You will see stomach, vitality, Ikuko, and Hanoko. Stomach shows how full you are, vitality shows how much energy you have, and the Ikuko and Hanoko hearts show how friendly you are with them.
Fortune
This option has Mametarou tell your fortune. You will see a kanji appear on the screen that represents your day.
Go to bed
This will tell Mametarou to go to bed. When he begins to get tired, you will need to tell him to sleep. Otherwise, he will stay up as late as he possibly can. This will cause him to sleep most of the next day away. When you select this option. He will turn in circles for a while before he finally beds down.
Rice/Food
Use this option to feed Mametarou when he begins to get hungry, or when the food icon appears. There is also a chance Mametarou may find food when he travels outside the house.
Walk
When Ikuko-chan is home, she may be willing to take Mame for a walk. Select this icon to travel somewhere with Ikuko.
Hanoko
 |
Mametarou can use this option to walk to Hanoko's house, and invite her to go somewhere. She may not always be at home. |
Park
 |
Selecting this option, you can go to the park. The park is for you to socialize, so there must be someone there for you to do something. |
Some interactions
I will post more interactions as I get more pictures.
 |
Hanoko comes over to Mame's house, and says that they can do anything today. Let's go! Then, they walk together to the beach. |
 |
Hanoko and Mame decide to explore the school grounds. Ikuko spots them and says "Mame! You shouldn't wander so much." |
- Details
- Category: Guides
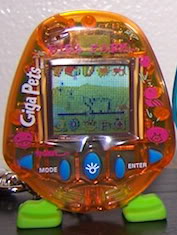 I posted earlier a video about the Giga Farm. I have received inquiries about the crop feature which is difficult to understand, so here is a write up to help some of you understand this feature.
Each animal you keep on the Giga Farm has different foods it eats. It is important to keep a good stock of crops to feed your animals. You can grow corn, beans, and wheat. The key to crops is when you plant and when you harvest. It is critical to how much yield you get from your seeds. Never let your seeds go below zero, you will have to reset if you ever want to plant that crop again.
Planting needs to happen between 6 and 7am. Water increases your yield as it is the food for the plants. Compost is the treat and increases the potential of your field. Having animals on a field decreases its potential. Pigs are the hardest on a field.
Harvesting your crops must happen between 3 and 6pm. If you harvest before this, you will not get any crops. It takes 10 seeds to plant a field, so be cautious of how much you have.
What is the trick to it? Set the time for 6 to 7am, plant your crops, set the clock to 3 - 6pm, then harvest. I do not think it gives you as much yield as waiting through the day for them to grow, but it is a quick trick to get some food for your animals when you are running low or you miss the planting or harvesting time.
Hope this helps!
- Details
- Category: Guides
Here is my unfinished Morino guide. I'm still gathering information for it.
The information I have gathered for this guide is completely based on my experiences with the Morino. That way I can ensure the information here is accurate and not theories.
Icons
- Status
- First screen - Hungry
- Second screen - Happy
- Third screen- Age,Weight
- Fourth screen - Length (Kabutotchi only)
- Food
- First food - Leaf. This is the main food, and the only food for a baby.
- Second food - During the Imotchi phase, this is the treat. During the adult stage, this is the special character-specific food.
- Third food - During adult phase, the treat is placed here.
- Fourth food - After 48 hours in the adult phase, the fourth food will appear.
- Game - This is a guessing game. You must choose a hat four times to find a leaf underneath. 2 out of 4 wins. 3 or more wins fills up 2 hearts instead of 1.
- Potty - Clean up poop!
- Predator This icon will light up when your bug is being attacked by a foot or a frog. It will call out, the icon will light up, then hit A and tap the case or screen to scare the threat away. You will gain happy points each time you save your bug.
- Medicine - Your bug cannot catch a cold, but it will need your medical care if you fail to save it from an attack. It will be bandaged up with a little cane. Select this icon to heal it.
- Light - This will turn the lights on or off.
- Attention - This is the attention icon. When your bug needs something, this will light up.
- Thermostat - This is the feature of the Morino that people tend to have the most trouble with. The thermostat does not move instantly or quickly, and it must be monitored. Morino characters are either Warm or Cool characters. When it enters into its cocoon, you must select either the cold or hot option on the thermostat. It will remain in it's cocoon for 24 hours. It is best not to keep the thermostat in the middle, but to choose cool or warm. Thermostat temperature changes are as follows:
THIS SECTION IS STILL BEING DEVELOPED AND TESTED.
The thermometer tends to behave differently. I'm still pining down facts with the different temperature changes each thermometer has. So far, I have found an 8 hour, 10 hour, and a 12 hour thermometer. Their changes are different from each other. The eight hour thermometer is extremely sporadic while the 10 hour thermometer seems to be the most structured. I have not have much experience with the 12 hour, and am also not sure if it really exists. It will require more research. I believe the different thermometers are linked with weight. I also believe the thermometer might tie into the different cocoons. All of the prior will need to be extensively researched after I have worked on my character methods.
Notes about Morino
- The Polka dot egg can only hatch Kabutotchi.
- The Morino has a screensaver feature. This can be quite annoying after a while, because you cannot watch for poop as easily. However, you can tell if your bug is injured, because the dot between the two trees will not move.
You cannot tell which cocoon you have until it turns into an adult. - Attacks happen every 4 hours.
- Details
- Category: Guides
Contents
Menu
Startup
Personal Belongings
Feeding
Technique
Presents
Care
Special Training
Connecting
Data
Sound
Clock
Battling
Random Events
https://www.youtube.com/watch?v=IDmCMnCfvvk
Menu
- Belongings
- Feed
- Techniques
- Present
- Care
- Special Training
- Challenge
- Iaido
- Zunzun
- Tournament Battle
- Communication
- Receive
- Send
- Go Back
- Data
- Strength
- Screen 1
- Stomach
- Tired
- Screen 2
- Type
- Name
- Screen 3
- Favorite Food
- Strength Score
- Screen 4
- Physical Fitness
- Technique
- Screen 5
- Stats
- Screen 6
- Equipment
- Screen 1
- Measurement
- Screen 1
- Size
- Age
- Screen 2
- Generation
- Victory
- Screen 3
- Challenges
- Winning Streak
- Screen 4
- Tournament
- Iaido
- Zunzun
- Screen 1
- Sound
- Clock
- Strength
Startup
Upon startup, you will need to set the time. The scissors hand is the left button, paper hand is the right button, and the rock hand is the enter button.

 To go back to your beetle from any menu, choose the Go Back icon.
Once you have set the time, you will be given a choice of three eggs.From the egg you choose, you will get a larvae! Start feeding your larvae lots of food. The more food you feed it, the bigger it grows. Before long, you get a juvenile beetle!
The name screen will appear where you enter your name using Japanese characters.
 The large, top number on the screen is your health points. The smaller, bottom number is how full your stomach is.
Your beetle has different ways of telling you what it wants. It can be tired, exhausted, hungry, starving, sleepy, asleep, injured, and sick. Your beetle gets tired after a lot of battling or training. If you continue to train or battle, your beetle will become exhausted. If you do not feed your beetle when it is hungry, it will become starved. After a loss in battle, it is possible for your beetle to become injured. You will see him with bandages wrapped around his torso. Heal him with the Care option. If he becomes sick, you can also give him medicine from the Care option. When it is time for bed, your beetle will start off as sleepy, then fall asleep.
 |
| Tired - Exhausted |
 |
| Hungry - Starving |
 |
| Sleepy - Sleeping |
  |
| Injured - Sick |
Personal Belongings
 You can see what items you hold in the personal belongings menu. From here you can feed your beetle, equip items to your beetle, or give your beetle a present.
 When your beetle is hungry, he will need to eat. Your beetle will display a heart in a speech bubble if you give him his favorite food. He will have an X in a speech bubble, and will refuse to eat if you give him his most hated food. You can clean up the uneaten food using the Care option, otherwise, it will rot.
Foods will not only feed your beetle, but they will affect the stats of your beetle as well. See the chart below to see each food and its effect.

 This is where you can equip different techniques to your beetle. These can have special effects on either your beetle or your beetle's opponent. Techniques are categorized in Rock, Paper, and Scissor stats. The top shows the effect of the technique. The x# shows how many you have of the technique, and the bottom shows how much Technique score your beetle must have before it can equip the Technique.
You can earn additional Techniques by battling or training.
 You can earn presents randomly in training. You can give these to your beetle for a variety of effects.
Care
 This option is how you heal, give medicine, and clean up after your beetle. Simple as that.
Special Training
 Training can yield food and presents.
Challenge
 In this game, you can fight other insects to earn food and Techniques.
Iaido
 This game you train how smoothly you attack. You can earn food and Techniques. You pick which level you wish to play at 1-3, easiest to hardest. When you see the exclamation point appear above the log, press any button as fast as you can. If you see a bomb appear above the log, don't press any buttons.
ZunZun
 This game is about speed and hitting the corresponding buttons. You will see Rock, Paper, and Scissor hand icons go across the screen from right to left. Press the corresponding button to make the symbols disappear.
Tournament Battle
 This is tournament style battling. You get a break between each fight where you can eat food, or change your equipment. Go back and select the tournament battle icon when you are ready for the next battle. The game keeps track of your winning streak. You can earn food and Techniques.
Connection
 This is the option to connect to other Mushiking beetles. The options are receive and send.
 |
 |
| Receive | Send |
Data
 The Data menu allows you to see the stats of your beetle as well as change your sound and clock settings.
Strength
In the Strength menu, you can see the details on your beetle's hunger, energy level, type, your name, your beetle's favorite food, strength score, physical fitness, technique, Rock-Paper-Scissors stats, and equipped item bonuses.
 |
 |
 |
| Stomach - Tired | Type - Name | Favorite Food - Strength |
 |
 |
 |
| Physical Fitness - Technique | Rock-Paper-Scissors Stats | Equipped Item Stats |
Measurement
 In the Measurement menu, you can see your beetle's size, age, generation, victories, challenges, winning streak, tournaments, Iaido, and ZunZun.
 |
 |
| Size - Age | Generation - Victories |
 |
 |
| Challenges - Winning Streak | Tournaments - Iaido - ZunZun |
 The Sound option lets you choose from three sound settings. Loud, quiet, and muted.
 Select this option to change the time.
Battling
The icon that has the small icon around it is the strongest move of your beetle. The choices your opponent makes are random. It works just like a game of Rock-Paper-Scissors. Rock beats scissors, scissors beats paper, and paper beats rock. The amount of damage that you inflict has to do with your stats and equipment. If you both choose the same attack, it is a draw, but both will still lose some health points. You can see your opponent's attack on the Rock-Paper-Scissors icon on the right. Yours is shown on the left. The big number is your health, and the small number represents your opponent's health. The battle is won when one party's health becomes zero. If you both hit zero at the same time, the battle is considered a draw.
Random Events
Random events can pop up at anytime during the day.
Food Competition
Sometimes you will get a random opponent. If you ignore the call, the opponent will steal the free food. Press any button to begin fighting your opponent to receive the food booty!
Black Adder
 The black adder is a random event where you will have to save your beetle from being attacked by a black adder. Press any button to scare it away.